Thursday, January 13, 2011

Planning Your Studio Space

Designing the look and flow of your studio can be a frustrating process. However, with a bit of knowledge and a dash of creativity, any space can be transformed into a functional and beautiful creative workspace. There are so many things on the list to consider including; laying out the room, selecting your furniture, organizing all those little bitty supplies that you just might need, and most importantly creating a space that inspires you to create.

You may have the challenge of working with little to no space or perhaps you are fortunate to have an entire room dedicated to sewing or craft; however, many of the same suggestions and rules will apply in both cases. Regardless of your available spaces, developing a basic floor plan can be invaluable. It will allow you to outline the dimensions of your room and identify the best possible layout to meet the needs of your workflow. At Crafted Spaces, we found it helpful to separate the room into sections based on specific task or functions.

When it came time to select our main worktable, the final choice resulted in an Ikea piece, which we felt met most of our needs.


The Ikea STENSTORP kitchen island has a great work surface, built-in storage space, and a sturdy construction. The height, at just less than 36" is also great for cutting and preparing projects. We also needed something that was not going to consume the small space we have to work with.

Tips for getting started with your studio space:
  1. Develop a floor plan
  2. Collect design and/or decorating ideas from magazines, online and via other sources
  3. Carefully select the colour(s) you are going to use, focusing on colour(s) that energize you and stimulates your creativity
  4. Select proper lighting for the task at hand
  5. Identify what type of storage and furnishings will work best for your type of craft
  6. Select a main workstation or table with a surface area that will best accommodate your projects and at a height that will not negatively impact your body
  7. Where possible select furnishings that have a solid construction and some available storage
  8. Be aware of the effects of direct sunlight on the materials you are working with
  9. Close your eyes and envision the type of space you need to enhance your creativity and productivity
  10. Have fun with the process

Suggested Reading:

Organizing Your Craft Space by Jo Packham

Wednesday, January 12, 2011

The Love of Crochet

Over the years I have enjoyed the art of crocheting. I remember all the great little baby items that my grandmother had made for me, and I think I still have a piece or two stored away. With the birth of each of her new grand child my grandmother has patiently and lovingly created a new baby blanket along with other great goodies.

Even now my children, the first of the great grand children have received their special blankets, booties and coats. Today I spent some time just sitting with my grandmother, each of us holding our crochet needle and working on our respective projects. I felt a true connection with her and the memory of her showing me my first crochet stitches as a child came to mind. I was truly happy to have the time to spend with her.

I had not crochet in several years, but decided that I wanted to make my baby something special. It is amazing how once you learn something you love doing; it can all come back to you no matter how long you stepped away from it. I even ventured to make a hat for my mom and husband.

Crochet: The Complete Guide by Jane Davis is a gift from my husband and a new addition to my resource library. It is a great book for beginner to advance alike, and both my grandmother and me are having fun learning and refreshing our skills.


Wednesday, January 5, 2011

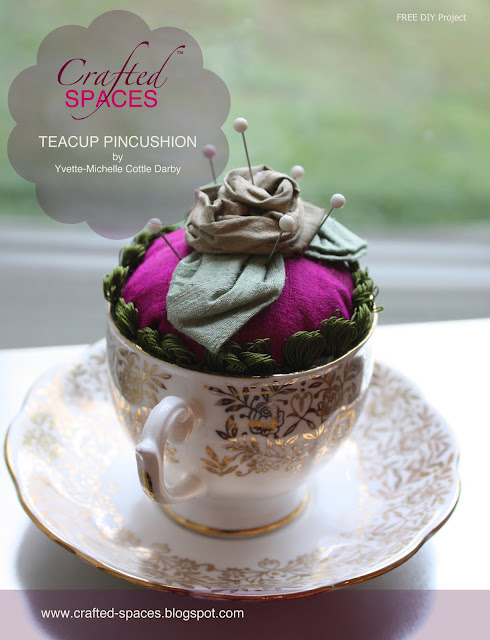
Teacup Pincushion

Click for FREE download

You are probably thinking to yourself; what is the obsession with pincushions? Well admittedly I love them and we have featured a couple different ones; however, I have been asked to provide details on how you can make your own. I have created a FREE download with a template and instructions. This is a great project that will add a pretty touch to any sewing or craft space. It will also make a great gift for someone special.

Instructions


Collect materials and cut fabric into a circle using the template provided

Pin pieces together as needed

Pass running stitch approx. 1/2" from the edge

Pulling thread bring edge into the centre

Form a bowl shape and stuff centre with stuffing,
then pull thread tightly and stitch in place

Place additional stuffing to the inside of your teacup (container)
to the desired height

Stitch or clue desired ribbon or trim (optional) to edge of stuffed fabric

Place glue along outer edge and at the base of the stuffed fabric
Set in teacup and press down in place

Embellish as desired using flowers or other details

Enjoy!
Related Posts Plugin for WordPress, Blogger...