Showing posts with label Sewing. Show all posts

Tuesday, February 28, 2017

Thrift Store Fabric Shopping


Over the years I have gotten some great fabric from thrift stores. There are lots of times I purchase fabric with no project in mind and the fabric often dictates the project I make. I may see a piece of fabric and a project instantly comes to mind. Then there are those occasions when I just have to purchase a piece because it is so beautiful and unique. However, when it comes to shopping for fabric at a thrift store the results can be hit and miss at best, but it is always a treasure hunt.

Identifying The Fabric
Thrift stores are a great source of materials for sewing, crafts and art projects. However, how do you know what you are purchasing. Sometimes you can feel the fabric and identify what it is and other times you have to take your chances and test the fibre when you get home. A fabric burn test is a great way to get an idea of what you are working with. With just a small swatch of the fabric, you should be able to identify if it is a natural or synthetic fibre. If you have enough of the fabric, you can also test a small piece for other factors like colour fastness and shrinkage. There are also lots of great fabric guides available to help you identify and work with different fabrics.

Cost Effectiveness
Fabric shopping can be an expensive venture, so a thrift store is great source if you are on a tight budget. You can sew beautiful projects for your home and make unique handmade gifts for your friends and family without a huge expenditure. It is also a great source for fabric if you are a beginner sewist and you do not want to spend a lot on materials to practice.

Unique Selection
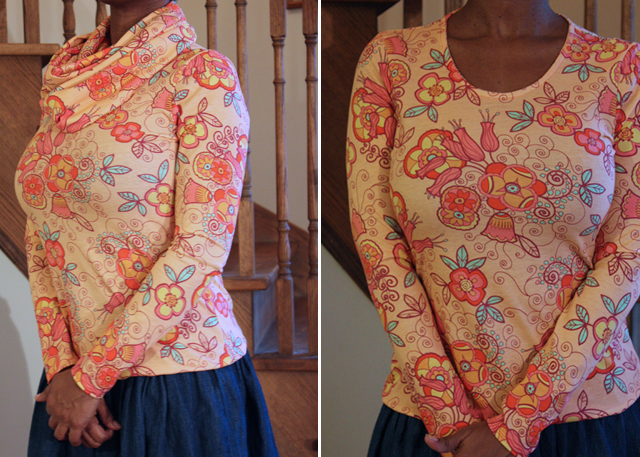
Thrift store fabric shopping is a great way to find unique fabrics. You can sometimes find beautiful vintage fabrics or designer prints.You can use them on their own or combine them with other old or new fabrics. Pieces will vary in size, but even a small piece can be used as an appliqué, pocket or bag strap. Often times you can get fabric by the yard or you can purchase a bed sheet or tablecloth.


Eco-friendly
Purchasing your fabric from a thrift store extends its' usefulness. You can prevent more materials from entering the landfill by repurposing abandoned yardage or an article of clothing. I do not usually purchase clothing pieces, but you can often find a piece that you can use for a project. If you do not want to use a piece of clothing, you can reuse the buttons or other elements.

Here are ten tips for fabric shopping at a thrift store:
  1. Head over to the linen section where you will find fabric by the yardage and ends. You can also find sheets, pillowcases, and table linen in this section.
  2. If you are purchasing bed linen; a crisp, new content label is a good indicator that the linen may not have been used.
  3. Examine the fabric for any imperfections, damages, weak spots and stains.
  4. Tug gently on an end of the fabric to confirm there is no dry rot due to poor temperature and moisture control. You will generally see other signs of dry rot, but if it is not visible the fabric will tear with a gentle tug. 
  5. Smell the fabric for any unpleasant odour. Some odours are difficult to remove.
  6. Access how much of the fabric is usable.
  7. Do not dismiss half completed projects that you can take apart and use in a new way.
  8. Do not buy it just because it is cheap; access the uniqueness of the material, how much you like it and what projects you will like to make.
  9. If you purchase a bundle of fabric in a bag; go through the bag after purchasing and donate any pieces I do not want, before you leave the store.
  10. Identify the fabric content and clean accordingly prior to use.

Project Ideas

Shower Curtain - made from vintage sheet
Apron - vintage pillowcase and new fabric
Hand Embroidered Apron - vintage pillowcase and new fabric
Scrap Pincushion - remnant fabric
I-Spy Bag Toy - old kids shirt

Please share your tips for getting fabric and other sewing supplies at a thrift store. What is your best thrift store fabric find?


Tuesday, January 31, 2017

20 Beginner Sewing Essentials

Vintage Sewing Box

Students often ask me; what they should have in their sewing kit. This post will share some essential items that I believe should be included in any beginner sewing kit. As your sewing skills develop and your projects become more complex, you may find it necessary to expand your sewing kit and to add specialty tools and other supplies. If you are still shopping for a sewing machine, check out a previous post on how to choose a sewing machine. If you have a sewing machine, some of the items mentioned may be included with your machine. You machine may also have a variety of attachments that can be used for various sewing techniques.

Left to Right: meter stick, pins, paper scissors, cotton thread, safety pins, hand sewing needles, water-soluble marker, gauge, sewing machine needles, dressmaker shears (fabric), measuring tape, plastic bobbin, seam ripper, pin cushion, polyester thread 
  1. Scissors - This is the first and perhaps the most important tool in any sewing kit. Invest in the best quality scissors you can afford, and dedicate its' use to only cutting fabric. Your scissors should make cutting your fabric easy and provide a nice clean cut. I recommend holding the scissors (if possible) prior to purchasing to confirm how comfortable the grip is in your hand. I have several different scissors in my collection, but the "Gingher" dressmaker shears are my favourite. I generally use a smaller scissors to clip threads. A good quality scissors will last you a lifetime.

  2. Paper Scissors - Use a separate paper or utility scissors for cutting your paper patterns. This will ensure that your quality scissors are not used for this purpose. These scissors can also come in handy for other purposes.

  3. Seam Ripper - We all have to use a seam ripper at some time or another. Have one handy to help make opening your seams easier and avoid damaging your fabric. They are also really handy for opening up the space in your buttonholes. Often there is a small seam ripper included with your sewing machine. This will be fine for some time, but can be replaced by a larger seam ripper with a larger more comfortable grip. The most important thing in a seam ripper is that it is sharp.

  4. Pins - Good quality pins that are sharp are essential. There are different types of pins available to suite the fabric you are working with. I recommend glass head pins, which have the added benefit of not melting if you iron over them.

  5. Pin Cushion(s) - Having a pincushion near by can be very handy and a safe way to collect your pins while you work. You can purchase a pincushion, but I always find it more fun to make one.

  6. Bobbins - Sewing machine bobbins are available in different types. It is always best to use the type of bobbin that is suited to your sewing machine. You will find that there are plastic and metal bobbins available. I recommend referring to your sewing machine manual or take your bobbin with you when you shop for new ones. You can visit a previous post on how to fill a bobbin.

  7. Sewing Machine Needles - Your sewing machine will likely come with a sample pack of needles. You can use a universal needle for many different projects, but you should purchase needles to suite the type of material you are working with. It is also recommended to change your needle with each project, for best results.

  8. Hand Sewing Needles - Having an assortment of hand sewing needles can be very helpful for hemming, basting and other sewing jobs.

  9. Needle Threader - Not everyone has perfect vision or a sewing machine with an automatic threader. These little guys can therefore come in very handy for both hand and machine sewing.

  10. Safety Pins - Having an assortment of safety pins can be very helpful. I often use a safety pin to secure layers of fabric together or to help pass elastic through a casing.

  11. Measuring Tape - A dressmaker or tailor’s tape is an important tool for taking body measurements, as well as measuring other types of sewing projects. The measuring tape will generally measure to 60" and will often have increments in centimetres and inches. If you are sewing home decor projects, I recommend also getting a longer measuring tape that goes up to 120".

  12. Measuring Gauge - The 6" measuring gauge is a handy little measuring tool that is great for all sorts of sewing task. It can be used for measuring a seam or hem and can assist with an accurate placement of your buttonholes, buttons and zippers.

  13. Meter Stick - You can find a meter stick at your sewing supply shop, art store, office supplies or hardware store. I have on hand a wooden and a metal meter stick. I have found that the metal meter stick is handy when using a rotary cutter.

  14. Water Soluble Fabric Marker - Having a good marking tool is important for transferring pattern markings and other details onto your fabric. The water-soluble fabric markers are great on most fabrics and will easily wash away. You can also use other marking tools such as chalk or fabric pens as an alternative. I have found that tailors chalk works best on dark colours and the "Frixion" iron away pens are great for fine lines. I recommend testing your making tool on a sample of your fabric prior to use.

  15. Thread - This may seem like an obvious one, but my recommendation is to always have on hand a variety of thread for different types of projects. Purchase good quality thread, which will be best for your sewing machine and provide a better stitch quality. Also consider purchasing several spools when they are on sale. I recommend having cotton thread for your cotton or linen projects, silk threads for your silk and wool projects and quality all-purpose polyester thread that works well with many different fibres. Generally you will match your thread colour to the dominant colour in your project; however, you can also use a contrasting colour thread for a decorative effect.

  16. Iron and Ironing Board

  17. Iron - An iron with a steam and variable fabric setting can really enhance the finish of your projects. Press your seams as you go for best results. Use a pressing cloth when needed.

  18. Ironing Surface - There are various products available to turn virtually any flat surface into an ironing surface. However, I have found that I get the best results from using an ironing board at the appropriate height.

  19. Self-Healing Mat - Using a self-healing mat to cut your fabric, can save your work surface from damage. Even if you have an old worktable or a dedicated cutting table, a cutting mat can be a helpful addition. They can be pricy depending on the type and where you purchase them. You can find rather large cutting mats at your local sewing supply shop. However, if you are looking for a more economical option, consider purchasing one from your local office or art supply shop.

  20. Lint Roller - A lint roller may not be at the top of the list, but depending on your fabric it can be handy to have one around. It is also a great way to cleanup loose thread on your projects.

  21. Washi Tape - I have used washi tape as a seam guide and it does not leave a sticky residue on my sewing machine. As an alternative you can also use painter's tape. I recommend removing the tape at the end of each use.
I hope that you have found this post helpful. This list is by no means everything you will ever need for sewing, but it is a great start to getting you on your way to enjoying sewing. If you have any recommendations on what you think should be included in this list just comment below.

Happy stitching!


Thursday, September 22, 2016

Pattern Review and Project Update


We recently shared our Fabric Haul: September 2016 video, and one of the lovely fabrics we shared was this beautiful cotton floral print from Len's Mills in Barrie, Ontario. I am not quite sure what I was thinking, but I only purchased one metre of the fabric along with a half-metre of a coordinating solid. I did try to get more of the fabric, but it was sold out. There was just enough fabric to make a basic shell top. The sewing pattern I selected is New Look #6483. This is a simple top with side (straight) darts, opens at the back of the neck and has bottom side slits. There is a sleeveless and short sleeve variation. The pattern is available as a printed enveloped pattern or as a downloadable.


Changes I Made
The top required just over a metre of fabric, so I had to adjust the length. I shortened the bottom of the top by three inches, making the adjustment just at the start of the side slit markings. I did not use the facing pattern pieces. I decided to make bias binding from the coordinating sold colour fabric, and used the bias to face the neckline and armholes. I also opted to not include the slits at the side seams, given that the top was shorter than the original pattern. I also used a half-inch seam allowance on the side seams, which has given me a tiny bit more ease across my bustline.

What I Will Change
The darts needed to be adjusted for a better fit on my body. Dart placement may not be an issue for someone else, but I suggest measuring the shoulder to bust and making any changes prior to cutting your fabric.


Overall, I really like this pattern and the fit is very comfortable. This pattern is included in our Garment Construction I pattern list. I look forward to trying the pattern with our students. It is a basic top, but the pattern provides an opportunity to learn about side (straight) dart placement, facing and the option to add sleeves. If you are new to sewing and will like to try making a basic top, this pattern is worth trying. The only down side is that only smaller sizes are available, ranging from bust size 30 1/2 to 38 inches. However, you could find a similar pattern with a broader size range. You can sew as instructed or use as a block and experiment with various modifications to make it your own.


Friday, September 16, 2016

Fabric Haul: September 2016


There are many options for purchasing fabric online and at your local shops. However, if you are new to buying fabric the process can be intimidating. If you are purchasing fabric online, I suggest learning about the different types of fabric and to order a fabric swatch when possible.

The sewing pattern you are using will generally provide some fabric recommendations. Using the recommended fabrics will mean that your finished project will potentially fit and drape the way the pattern designer intended. However, I recommend trying other fabric options as a way of learning how different materials work. In some cases you may love the results and in other instances you may simple gain a better understand of why some fabrics work best for a given project.

We hope that our Fabric Haul video is the first of many such videos, where we will share with you the fabrics we are using at the studio. We also hope to provide you with great tips on how to purchase and use different types of fabrics.

Let us know what you think of our Fabric Haul: September 2016 video and perhaps share with us your favourite fabric designers and suppliers.

Resources:

Simcoe Sew and Quilt - Located in Barrie, Ontario, this quilt shop has a beautiful selection of fabrics, mostly quilting cottons. They also sell sewing machines and other sewing supplies.

Len's Mills Stores - Several locations with a huge selection of fabric; including, home decor, dress making materials, quilting cottons and tons more.

Fabricland - Many locations across Canada. There is a huge selection of fabrics at different price points. Good chance you will find something on sale. They also have sewing patterns and lots of notions.

Jo-Ann Stores - Stores are located in the United States. They also sell online, but at the time of this post, they announced that they would no longer be shipping to Canada as of September 30, 2016.

Affordable Fabrics - Was unable to find a website. They are located in Toronto in the Queen and Spadina area. There is so much to choose from in this tightly packed store, so give yourself some time to visit this shop.

Tonic Living - Located in Toronto and also available online. Beautiful selection of fabrics with a focus on home decor. Great quality fabrics!

Value Village - This thrift store has many locations, and generally has a selection of craft and sewing items. It can be hit or miss given it is a thrift store. I recommend carefully examining the fabric pieces. Can be a great opportunity to find vintage fabrics and patterns.


Monday, September 12, 2016

Pattern Haul: September 2016


There are many options for sewing patterns that are available. Most of the patterns we use at our studio are commercial sewing patterns. The reasons for using these patterns in our studio are accessibility and the wide selection of pattern designs; which make them a great choice for our students. These patterns are generally available at local sewing and fabric supply shops. Commercial patterns can also be purchased online direct from the manufacturer's website. Other great options for sewing patterns include, downloadable pdf patterns and printed independent patterns.

If you are new to purchasing sewing patterns, I recommend starting at your local fabric shop where you can review and select your patterns prior to purchasing. There are generally pattern catalogues available for you to select from. If you are not sure what size pattern to purchase, look for the size or body measurement chart in the pattern catalogue. You can also review our posts on "How to Take Body Measurements" and on  "Selecting a Pattern." The catalogues will also indicate the skill or difficulty level for each pattern, which can be very helpful especially if you are new to sewing.

Let us know what you think of our Pattern Haul: September 2016 video and perhaps share with us some of your favourite patterns.

Resource:
The McCall Pattern Company


Saturday, August 20, 2016

How A Journey Girls Doll Can Improve Your Sewing


We recently did a video to share with you guys our cute little model, a Journey Girls eighteen inch doll. The idea to add a doll to the studio has been something I have wanted to do for some time now. I had purchased a couple smaller dolls that I had found at the thrift store, but finally realized that I was going to have some difficulty finding an eighteen inch doll at the same location.

I can fondly remember learning how to sew as a child, by making clothing for my dolls and progressing to matching projects for myself. What seems life a lifetime later; I now have several young students that are eager to learn how to sew by making clothing for their dolls. I have found that the eighteen inch doll clothing is easy to make and is a great introduction to sewing. Several commercial pattern manufactures have developed patterns for eighteen inch dolls and there are lots of books available with patterns and instructions. The patterns are also easy to draft on your own.

As a mother of two boys, I can probably tell you about every video game and Lego set on the market; however, purchasing a doll was new territory for me. The American Girl dolls seem to be the most popular eighteen inch dolls, and most of the patterns I have found seem to reference these dolls. Several of my young students have an American Girl doll and we have done projects for them; however, I was not aware of the price until I started looking to purchase one. I did some research and soon discovered the significant price tag, which I was not willing to invest in a doll. With a bit more research, I found the Journey Girls and My Life As dolls. I then decided to get the Journey Girls (Chavonne) doll, which I purchased at ToysRUs.

As an adult learning how to sew, having a doll can also serve as a learning tool. You can use the doll to sew a complete outfit, see how different fabrics might work together and practice different sewing techniques. You can then transfer those sewing skills onto your other projects. I will share with you guys projects that are made for our little model. I am hoping to add another doll from the Journey Girls collection to the studio. I will also love to hear from you guys, how you think a Journey Girls doll or other type of doll can improve your sewing skills.


Saturday, June 18, 2016

Sew-Along - Reversible Jacket


This jacket pattern is the "Kwik Sew K4104" and was originally planned as part of our Fall Sew-Along last year; however, I decided to make the jacket as a reversible spring/summer jacket. It is the first project in our Summer Sew-Along, which will include several fun sewing projects that are great for warmer weather. A picture of the jacket was shared on our social media a few weeks ago. Since then, I have been loving wearing the jacket and will be making another one. This sew-along will share details of how the jacket was sewn together. I hope it will inspire you to try making one of your own.


Style Details
This is a lined, three-quarter length sleeve jacket, with no closure. There are darts in the bodice and sleeves, a waist seam on the front and a centre seam down the back. I decided to sew View A, which includes front welt pockets that I did not include. I chose not to include the pockets in order to achieve a smooth, double-sided jacket with as little bulk as possible.

The pattern ranges from size XS to XL. I made the medium size, which is a tiny bit roomy for me, but allows me to wear various style tops. You will want to confirm your size, based on your body measurements and your desired fit.

I used 100% cotton fabric for both sides of the jacket and finished my seams with my serger (optional). The navy blue and lime green polka dot is a medium weight woven (fabric 1), while the floral print (fabric 2) is "Flourish in Twilight" a quilting cotton by Anna Maria Horner. I also used cotton thread in coordinating colours. No additional notions or interfacing was used.

Preparation
I prepared my fabrics by pre-washing them to account for shrinkage. I felt this was particularly important since I was using two different types of cotton and was not sure if the shrinkage would be the same. I also reviewed the pattern instruction sheets and confirmed where I could make changes in the design.

Once I had identified the size I was going to make I confirmed if I needed to make any changes or alterations to the pattern, such as dart placement and shortening or lengthening. I did not make any adjustments at these points and proceeded to cut my fabric and transfer markings. I then decided to serge various edges of the fabric. This was particularly useful on the polka dot fabric to reduce fraying.

Sewing
  • I worked through step 1, skipped steps 2 and 3 (regarding the pockets), and proceeded to step 4 and sewed as instructed.
  • I finished the center back seams by serging the raw edges together after sewing. If you do not have a serger, you can use a pinking shear or use the zig zag stitch on your sewing machine.
  • The side and shoulder seams were pressed open.
  • I then repeated the steps with fabric 2.
  • Once both pieces of fabric were at the end of step 4, I proceeded with step 5 and attached the sleeves. I found it very helpful to hand baste the sleeves prior to stitching.
  • With both the outer and inner sections of my jacket completed it was now time to attach them to each other. As instructed in step 12, I faced the fabrics with right sides together and stitched along the front center edge and around the neckline of the jacket.
  • I then did an under-stitching along the same edges as far as possible.
  • I followed the instructions for finishing the bottom edge of the sleeves and turned the jacket inside out.
  • I followed by stitching along the hemline, leaving an opening to turn the jacket inside out.
  • The finishing touch was closing the opening of the hemline with hand stitching.

Tip! I did not leave an opening on the side seam as instructed, but inside left the opening along the hemline. I then used hand stitching versus machine stitching to close the opening to create a finished look.

Pattern Matching
As noted before, there is a front waist seam on this jacket, as well as a centre back seam. As a result some pattern matching is helpful in order to achieve a sleek seamless look. I suggest familiarising yourself with pattern matching in order to get the best results. If you are pattern matching some additional fabric may be required. As an alternative to pattern matching, consider using a solid print.

Ironing
I cannot stress enough how much ironing your project as you sew, can make a difference to the final project. Some of the seams in this project were pressed open, while ones like the center back seams; were pressed over to alternate sides. Some fabrics may require that you use a pressing cloth, while other may be best sent to the dry cleaners after sewing. Pressing tools such as a tailor's ham and sleeve board were very helpful for this project.

Changes I Made
I really like the simplicity of this pattern and it lend itself very easily to be made into a reversible jacket. Outside of attaching both sides of the jacket with the opening at the hemline, the only significant change I made was not including the pockets.

What I Will Change
I really thought about this project and what I will change the next time I make it, but really could not come up with any significant changes. As mentioned before, I did not include the pockets and perhaps I will try adding the pockets in a future version. I may also include the collar in the contrasting fabrics.


Well, I hope you have enjoyed this project. I hope you will try making your own jacket along with the other sewing projects posted on our site. We are also excited to see your creations, so remember to share via social media with the hash tag #cssewalong. Visit us in the coming weeks for our next sewing project.

Happy stitching!


Summer Sew-Along | Next

Summer Sew-Along
How To Take Body Measurements
Selecting A Pattern
How To Prepare Fabric For Sewing
How To Cut Pattern And Fabric Pieces
Reviewing Pattern Instruction Sheet
Sew-Along - Reversible Jacket


Last updated 06/27/16

Tuesday, January 26, 2016

Fabric Haul: Green Brocade


We are now twenty-six days into the new year and I already have a start on my fabric buying for the year. I have made a couple purchases which have mostly been for our Crafted Spaces sewing classes, but I have also found a few personal gems along the way. This year, one of my resolutions is to exercise self-control and limit my fabric purchases to pieces I plan on using within the following weeks or months. However, I know that once in a while I will come across a piece of fabric that is just too beautiful to pass up. I hope to limit those purchases as well, but we will see how well I do or if my fabric addiction will get the better of me.

I started this new "Fabric Haul" blog feature to share with you highlights of what I have purchased and hopefully the projects I will make. I will also share some details about the fabrics and tips on using them in different projects. The first fabric I will like to share with you, is this really beautiful green brocade.


When I first saw this brocade fabric I was not sure if the colour was WAY to BRIGHT, but I really loved the look and feel of the fabric. After some lamenting, I decided to purchase a small piece because it was way too beautiful to walk away from. I purchased .5 meters of fabric; just enough to make a beautiful accent pillow. I also got some luscious yellow vintage velvet ribbon and an invisible zipper to match the fabric. The weight of the fabric makes it a great choice for different home decor projects or for making a handbag. The other great thing about this fabric is that it can be used on the reverse side.


I purchased the fabric and notions from King Textiles. I have been going to King Textiles for a really long time and I do not think I have ever left this store without purchasing something. I love the insane selection of fabrics and there is literally something for every type of project. They are located at 161 Spadina Avenue, Toronto, just south of Queen Street. There are two floors of wall to wall fabric and I suggest giving yourself lots of time to shop.

It is no secret that I love fabric. I love the beautiful surface designs, texture, colours, drape and the endless possibilities for what you can create. I have several stores and online retailers that I regularly purchase from and I also like trying new shops. When I travel, I am always sure to visit the local fabric shops; not to mention, I regularly visit thrift stores where I find great vintage fabric. If you have any suggestions for shops that I should try, please comment below.

This post is not a sponsored post and the fabric featured was a personal purchase.


Monday, November 23, 2015

Sew-Along - Burda 6820 T-Shirt


The third project in our Fall Sew-Along is a fitted long sleeve t-shirt, Burda 6820 pattern. There are three lengths and sleeve styles provided on this pattern, which offers you some options. The pattern envelope suggest using a two-way stretch jersey. I used a cotton and spandex blend floral print, which I have had in my stash for some time now. The vibrant print is a fun alternative to a basic t-shirt and I found that this fabric was easy to work with. I also made a matching infinity scarf, which paired with the t-shirt makes a warmer option for cooler temperatures. Like the previous projects, this post is to be used together with the pattern instructions. I therefore recommend that you read the first few post in our sew-along and that you have your pattern ready.

Style Details
The t-shirt is fitted with long sleeves and a round neckline. The neckline is faced and topstitched. There is also topstitching on the sleeves and hemline. I also really like that this pattern does not have a centre back seam.


Getting Started
I started by reading through the pattern instruction sheets and I identified the steps needed to sew the t-shirt. There are only a view illustrations on the instruction sheets so you will want to carefully read through the written instructions. I decided to sew the entire project using my serger and used the sewing machine for some basting. I also did some hand basting in several areas and I suggest having a needle and thread handy. If you do not have a serger, I recommend using a walking foot attachment. Another recommendation would be to use a stretch stitch or small zig zag stitch for your seams (refer to your sewing machine manual). You can also finish the hem on your sleeves and shirt hemline with twin needles.

I was short on time and decided to forgo on pre-washing my fabric. However, I would recommend that if you are working with a natural blend fabric that you take the time to prepare your fabric to avoid shrinkage. I expect some shrinkage the first time I wash my t-shirt. I did however, cut the ends of my fabric evenly and took the time to fold accurately to best identify the grain.

Sewing The T-Shirt
  • First I pinned the front and back pieces with right sides together at the shoulders and serged using the 5/8" seam allowance.

  • I then stitched the short ends of the neckline facing together, folded the facing lengthwise (wrong sides together) and pinned the facing to the neckline as instructed. I then sewed the facing to the neckline and trimmed. I followed the instructions and folded the facing towards the inside of the neckline and ironed. I used hand basting to keep the facing in place and topstitched close to the edge of the facing, then removed the basting stitch.


  • I then sewed the side seams and sleeves, right sides together, with a machine basting stitch (looser tension and larger stitch length).
  • I then pinned and hand basted the sleeves into the shoulder and armhole area of the shirt. I machine basted the sleeves using 1/2" seam allowance. I was careful not to include the seam allowance on the sides and sleeve length.
  • I then opened out the basted sides and sleeve seams and serged the sleeves along the armhole curve with a 5/8" seam allowance. I then folded the hems on the sleeves and used the cover-stitch machine to finish. This method then allowed me to sew the side seams continuously along the sleeves and into the sides of the shirt with the serger. To give myself a little more room in the fit, I used a 1/2" seam allowance. If you do not have a cover-stitch machine for the sleeve hems, you can use twin needles (refer to your sewing machine manual).


  • The final step was finishing the hemline of the shirt. I folded the hem and used my cover-stitch machine to finish. As mentioned before you can also use twin needles for this step (refer to your sewing machine manual).


Changes I Made
I did not make any changes to the basic structure of the shirt, I did however make changes to the steps in sewing it together. The method I used made it easy for me to set the sleeves and finish my hems.

What I Will Change
I have been sewing for many years, but I have never made a t-shirt before. I am very happy with the finished t-shirt and I am looking forward to making more. This project came together very quickly. It is a great basic pattern, which leaves lots of room for making it one's own. Next time I might try making it with a contrasting colour on the sleeves and adding a contrasting band at the bottom.

I think it is very important to have the right tools, especially when working with knitted fabrics. The right tools can make a world of difference to how well your knitted projects come together. The main reason I did not make a t-shirt before is because I often find it frustrating and time consuming working with knitted fabrics.

My studio is equipped with lots of great machines and I really found my Janome Cover-Pro 1000CPX (cover-stitch machine) extremely helpful for this project, while on the other hand my serger was invaluable. I also used my regular sewing machine for sewing the facing and for machine basting. However, not everyone has a serger or a cover-stitch machine, and this is where the walking foot and stretch stitch can be very helpful (refer to your sewing machine manual). You may also want to have the right sewing machine needle for the job and be prepared to do some hand basting.

I hope that you have enjoyed reading this post and I look forward to seeing your t-shirts. Consider mixing the style features to see what you can come up with. If you are in the Barrie, Ontario area and will like to learn how to use a serger, check out one of our serger basics classes. You are also welcome to book studio time with our machines.

Remember to share your projects with us via Facebook and Instagram. Do not forget to use #cssewalong. 

Sunday, November 8, 2015

Sew-Along - New Look 6005 Pants


The second project in our Fall Sew-Along is loose fitting cargo style pants, the New Look 6005 pattern. The pattern envelope has several suggested fabrics listed. The suggested fabrics have a little bit of body or weight to them, such as the lightweight denim and twill. I decided to use a linen fabric for this project, and added an African cotton print as contrast. As mentioned in our previous skirt project, this post is meant to accompany the pattern instructions included in your pattern envelope, so have your pattern ready. I also recommend that you read the previous post in our sew-along to prepare for sewing your project.

Style Details
The pants have pockets and a pull cord in the waist and hemline. There is also topstitching on the pockets, waist and hemline.


Getting Started
I started by reading through the pattern instruction sheets and I identified where I wanted to make a few changes. There are several pants styles available with this pattern and I choose design "B," but made a couple changes. I did not include the side leg pockets and used a contrasting fabric on the top pockets. I also decided to have closed seams, so I did not finish my edges with a zig zag stitch or serger prior to sewing.

Sewing The Pants
  • I attached the pockets to the pants front pieces as instructed and finished with a topstitch. Ironing is very important to achieving a nice finish, and if needed use some hand basting. I ironed at each step and found that the pockets laid flat along the curved opening. If your pockets do not lie flat along the curve you can also place a few small snips along the curve along the seam allowance, which should help it lie flat.


  • Once the pockets were sewn in place, I sewed the front and back pieces of the pants at the inside seams (inseam). I then finished the seam closed with the serger. To finish, I ironed the seam over towards the back leg pieces. You can choose to press open your seam or finish with a zig zag stitch. I did not include the side leg pockets; otherwise, I would have stitched the side seams first and attached the side pockets as instructed in the pattern instruction sheet(s).
  • Next I placed the two sewn pieces right sides together matching notches and sewed at the centre seams. I then serged the seam closed and ironed the seam over to one side.
  • I followed by ironing the fusible interfacing and sewing the button hole (for pull cord) at the bottom of each pant leg close to the hemline. I used a seam ripper to carefully open the button hole. I then serged the edge of the hemline.


  • I then turned the pants with the right sides facing each other and centre seams together. I stitched the side seams and serged them with the seams closed.
  • Next, I ironed a small piece of fusible interfacing onto the waistband and sewed the button holes for the pull cord. I also placed right sides together and sewed the short ends of the waistband together leaving a small opening as instructed. I followed by folding the waistband lengthwise with the wrong sides together and pined it to the waistline of the pants, matching notches and side seams. I then stitched the waistband to the pants and I finished the raw edge with the serger. I ironed the seam towards the inside of the pants as directed and topstitched around the waistband just below the seam.


  • The final step was to fold the hem as instructed and topstitch. I had previously serged the hemline, so I did not fold in the raw edge, but left it visible. Using a safety pin, I then pulled the twill tape through the waist band and hem casing. I used 27 inches of twill tape in each hem casing and 1.5 yards at the waist.


Changes I Made
The biggest change I made was not including the side pockets on the legs of my pants, which is a signature feature on cargo pants. I used a contrasting fabric for the pockets to add a splash of colour. I also did not use any elastic in the waistband and just used the twill tape.

What I Will Change
  • I will replace the narrow twill tape in the waist with a wider width tape.
  • I will like to make the pants in a lighter weight fabric for the summer.
  • I will topstitch in a contrasting colour thread to add decorative detail.
I hope that you have enjoyed reading this post and I look forward to seeing your pants. Consider mixing the style features and see what you can come up with. Remember to share your projects with us on Facebook and Instagram. Do not forget to use the #cssewalong. If you are looking for inspiration on how to wear your cargo pants, do not forget to visit our Pinterest fashion board.

Our next project is a long sleeve t-shirt. I used Burda 6820 pattern and the details will be posted soon.


Previous Post | Next


Fall Wardrobe Sew-Along
How To Take Body Measurements
Selecting A Pattern
How To Prepare Fabric For Sewing
How To Cut Pattern And Fabric Pieces
Reviewing Pattern Instruction Sheet
Sew-Along - Butterick 6182 Skirt
Sew-Along - New Look 6005 Pants
Sew-Along - Burda 6820 T-Shirt


Tuesday, November 3, 2015

Sew-Along - Butterick 6182 Skirt


The first project in our Fall Sew-Along is this cute a-line skirt, the Butterick Lisette B6182 pattern. You will require the pattern to best follow along with this post. Visit our previous post on Selecting a Pattern for more details.

I really like this skirt and found that the sewing went very quickly. I used a linen blend fabric which was great to work with and was an excellent choice for this skirt. If you are new to sewing, the most challenging parts may be the pocket facing and the invisible zipper. However, if you have an invisible zipper foot it will help make the sewing much easier. I also suggest that you have a needle and thread handy for some hand basting.

Style Details
This a-line skirt has an inverted centre pleat, side-front pockets with a pocket facing, a wide waistband and an invisible zipper.


Getting Started
I started by reviewing the pattern instruction sheets and confirming what steps were required to sew the skirt.
  • The first step was to iron the fusible interfacing to the waistband fabric. To ensure that there are no wrinkles or bubbles I worked from one end of the waistband to the other.
  • I then stay stitched the required pieces as instructed. I also finishing off the edges (skirt side seam and center back seam) with my serger. If you do not have a serger, you can finish with a zig zag stitch along the edges. On some sewing machines there is also a version of a cover stitch (refer to your sewing machine manual).


Sewing The Skirt
  • I created a centre front pleat and used the iron to set it in place. The instructions suggest that you then baste the top of the pleat at the waist line.
  • Next I sewed the pocket facing, which is a small strip of fabric on the inside edge of the pocket. I found it really helpful to iron and hand baste during this step.


  • When I was finished facing the pockets, I serged the side seam edge of the pockets and continued to prepare the pockets as instructed. I then sewed the pockets onto the skirt using a topstitch. At this point, the front of the skirt was finished.
  •  I then sewed the front and back pieces of the skirt together at the side seams and sewed the waistband to the skirt.
  • The next step was to sew the invisible zipper to the back of the skirt. It is helpful to have an invisible zipper foot when sewing the invisible zipper; however, you can use a regular zipper foot for the job. In both cases, I suggest hand basting the zipper before stitching. If you do not get the perfect finish with your regular zipper foot you can try stitching a second time, closer to the zipper teeth. After sewing the zipper in place I sewed the back center seam.


  • I then folded the waistband lengthwise towards the inside of the skirt and finished the ends as instructed. The pattern instructions suggest using a slip stitch to finish off the waistband on the inside. As an alternative, you can also topstitch the waistband, which can add a decorative touch.


  • The final step was the hemline. I finished my hem by serging around the raw edge of the skirt, folding, pressing, then topstitching. Next, I passed the iron along the hem for a crisp finish. As an alternative, you can hand hem or use a blind hem stitch on your sewing machine (refer to your sewing machine manual).


Changes I Made
When I prepared the pocket, the notches did not line up at the side seams and waistband. I therefore focused on matching the side notches and ensured that the pocket laid flat at the waistband. The fraction of a difference at the waist is not noticeable and the pockets lay flat and look great.

What I Will Change
I really like the skirt and will love to make it again; however, I find the waistband a bit too wide and it gapes slightly. Next time I will make the waistband a bit narrower and adjust for the gaping. I will also try lining the pocket as an alternative to the pocket facing. I also think it will be great to make the facing with a contrasting fabric, which can add a decorative touch. Topstitching with a contrasting colour thread can also enhance the look of the skirt. I am also interested in trying this skirt in a light weight wool blend fabric.

A Note On Seam Finishes
Generally pattern instruction sheets do not cover how to finish your seam, you are simply given instructions for the amount of seam allowance. In the case of this skirt pattern, the seam allowance is 5/8". If you do not have a serger to finish your seams, you can leave your seam as is (but they may fray), or you can use a number of other seam finishing methods. You can use a zig zag stitch or a pinking shares. Some machines may also have a cover stitch that has a similar effect as a serger (refer to your sewing machine manual). Another option is to use seam binding or bias binding.

I hope you have found this sew-along helpful and I look forward to seeing your skirts. Remember to join us on Facebook and follow on Instagram. You are also invited to share your pics with us on the sew-along group or tag your pictures with #cssewalong. I hope you will join us for the rest of our sew-along. Our next project is cargo style pants, New Look 6005.

I have added some inspiration to our Pinterest fashion board to share how you can wear your new a-line skirt. Enjoy!

*This post was last updated on 11/24/2015


Previous Post | Next


Fall Wardrobe Sew-Along
How To Take Body Measurements
Selecting A Pattern
How To Prepare Fabric For Sewing
How To Cut Pattern And Fabric Pieces
Reviewing Pattern Instruction Sheet
Sew-Along - Butterick 6182 Skirt
Sew-Along - New Look 6005 Pants
Sew-Along - Burda 6820 T-Shirt


Monday, October 26, 2015

Reviewing Pattern Instruction Sheet

I wanted to share a brief post on reviewing your pattern instructions prior to sewing. This is something that I emphasize in my sewing classes and wanted to share in this post. It may seem like stating the obvious, but it is a very common mistake that can be made. In the excitement of starting a new project you may not read through the full instructions prior to sewing, which means you may have a few surprises when you are sewing.

Your pattern generally comes with a pattern instruction sheet(s), which I referred to in the post on How to Cut Pattern and Fabric Pieces. There may be several sheets folded together, which has fabric layouts, a glossary of the pattern symbols and step-by-step sewing instructions. Unfortunately, instructions are not always clear and concise and can take away from the fun of sewing. A full review prior to sewing, therefore means that you can identify if the instructions are clear and easy to follow.

Here are some of the other benefits of a full pattern instruction review:
  • Confirm that you have cut and prepared all your pieces correctly.
  • Take you through the steps and techniques needed to complete your project.
  • Confirm the seam allowance needed for the different parts of the project.
  • Help you plan your workflow, especially on a big project.
  • A great way to identify where you can make modifications to the sewing process.
Once you have reviewed the pattern instruction sheet(s), you can decide if you will like to modify the style of the project. You can decide if you want to add or remove elements from the design or how you will add any decorative detailing. Now you can get started with the sewing and go back through the instructions step-by-step.


Previous Post | Next


Fall Wardrobe Sew-Along
How To Take Body Measurements
Selecting A Pattern
How To Prepare Fabric For Sewing
How To Cut Pattern And Fabric Pieces
Reviewing Pattern Instruction Sheet
Sew-Along - Butterick 6182 Skirt
Sew-Along - New Look 6005 Pants
Sew-Along - Burda 6820 T-Shirt


Thursday, October 15, 2015

How To Cut Pattern And Fabric Pieces


In our previous post we discussed how to prepare your fabric for sewing. Once you have prepared your fabric, it is time to cut your pattern and fabric pieces. Preparing your pieces properly will make your sewing much easier. It is important to cut your pattern pieces accurately, so remember not to rush through this process.

What you will need:
  • Pattern
  • Paper scissors
  • Fabric scissors
  • Dressmaker's pins
  • Pattern weights (optional)
  • Fabric
  • Fabric marker or tailor's chalk
  • Highlighter (optional)
First you will want to identify which pattern pieces you will need. The pattern pieces will most likely be numbered and labeled, so refer to the pattern line drawing to identify the pieces for the project you are sewing. Cut each piece according to the size you are sewing. Carefully cut your pattern piece just outside of the drawn outline. Your seam allowance is generally included so you do not need to cut beyond the outline.

Some patterns will have the different sizes outlined in different colours, while others will have a variation of solid and dashed lines. In cases where the lines are sold with the same colour for all sizes, be extra careful to follow the line you need. It can be helpful to first trace your line with a highlighter before cutting. The skirt pattern we are using for our first project in our fall sew-along has lines that are the same colour, but they are varied between a solid and dashed lines.

Once you have cut out your pattern pieces, you are ready to lay your pattern pieces on your fabric. Fold the fabric with your salvaged edges together and smooth out any wrinkles in the fabric. Lay your pattern pieces as instructed on the pattern instruction sheet.

Pin pattern pieces in place, then cut fabric out by following the outline of the pattern pieces. You can use pattern weights as an alternative to pinning. Repeat with any needed lining or interfacing. When you have cut your pattern pieces, transfer any markings prior to removing your pins.


Tip! If your pattern pieces are wrinkled or creased, you can use a low setting on a dry iron and smooth the pieces out.


Pattern Tracing Method
You can choose to transfer your pattern instead of cutting the pieces out. This method will preserve your pattern in all of the sizes, allowing you to sew multiple sizes of your project. This is also a great idea if you want a more sturdy material for repeated use or if you are not sure what size you need and will like to do a muslin sample prior to sewing in your desired fabric.

You can transfer your pattern using fabric, tracing paper or kraft paper. You can purchase tracing paper in sheets or in a roll format. The kraft paper is generally in a roll. You can find both tracing and kraft paper at art and craft supply stores, as well as office supply stores.

Tracing paper is fairly transparent so this makes it easy to lay it over your pattern sheets and trace out your pattern using a pencil and then outline with a marker. On both tracing and kraft paper you can use a tracing wheel and follow the traced lines with a pencil or marker. In all cases including the use of fabric, you can use a tracing wheel in combination with dressmaker's carbon paper. Like with the previous method, you will want to transfer all your markings; however, you should also note the pattern number and other details.

Once you are finished with your original pattern pieces, carefully fold them and return them to the pattern envelope. You can check out our post on Organizing Sewing Patterns.

Now you are ready to start sewing!


Previous Post   |  Next


Fall Wardrobe Sew-Along
How To Prepare Fabric For Sewing
How To Cut Pattern And Fabric Pieces
Reviewing Pattern Instruction Sheet
Sew-Along - Butterick 6182 Skirt
Sew-Along - New Look 6005 Pants
Sew-Along - Burda 6820 T-Shirt


Related Posts Plugin for WordPress, Blogger...