Natural dyes can be derived from plants, fruits, insects and other sources in nature. For centuries cultures around the world have perfected natural dying techniques. I researched this further and found countless books on the topic and will continue to explore this topic further as I expand and transform my own work.
On Wednesday, September 21, 2011 on Crafted Spaces Radio I shared how to prepare a natural dye bath and other tips for dying. Here are some images and further instructions.
Freshly picked Goldenrod
Start the process by separating the flowers from the rest of the plant parts and use as much of the yellow as possible. If you choose to include everything, this will influence the colour.
Place the flowers into a large stainless steel pot (thrift store find) covering with water reaching 2/3 of the pot or approximately 9 cups of water. You can also place plant material into a pantyhose (white) or wrap in cheese cloth. Please keep in mind that the material you chose to wrap with may also influence the colour of your dye bath.
Simmer for an hour and leave overnight in the pot.
Strain away the flowers from the liquid and there is the dye bath (right). It has an amber tint. You may discard remaining flowers.
Measure out eight cups of die bath and place into stainless steel pot.
(option 1) Add a 1/2 cup of table salt to the dye bath and stir.
(option 2) Prepare a fixative solution of 1/2 cup salt and 8 cup water. You will then place your damp fabric into this solution and boil for an hour. Then rinse your fabric and place into your unsalted dye bath.
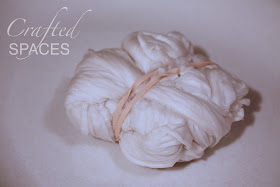
Place your damp fabric into dye bath and simmer for 1 hour. You can leave it soaking in dye bath overnight depending on the depth of colour your desire. To create a tie dye effect, twist your fabric and used a rubber band to secure. You can also place your fabric untwisted into the dye bath for complete coverage of fabric.
Silk Before
Silk After
When finished, remove from the dye bath and rinse in cold water until water runs clear. Hang to dry and iron as needed.
Finished Project!
It is recommended to use pots and other utensils that are dedicated to your dying projects. Do not use items that are also used for cooking or will otherwise come in contact with your food. I also suggest that prior to using any natural or other dyes, that you confirm the possible harmful nature of what you are using. Work in a well ventilated space and wear gloves as an added safe guard. There are lots of great resources available on this topic, so take the time to visit your local library or do some research on the internet. Have fun!
Some books on the topic include:
Wild Colour by Jenny Dean
The Complete Guide to Natural Dyeing by Eva Lambert
Natural Dyes by Linda Rudkin
Harvesting Color: Making Your Own Natural Dyes by Rebecca Burgess
Eco Colour by India Flint


Wow, what a clever idea! I have a head of red cabbage in the fridge that would be neat to try! Thanks for sharing!!!
ReplyDeleteHi Brandi, Glad that this project has inspired you. Hope to see your project with the red cabbage :-)
ReplyDelete